

Grid method drawing: how to enlarge a drawing using a grid
The grid method lets you copy a small picture onto bigger paper, one square at a time. The grid gets the shape right; your own changes make the drawing yours. The creator of Fern used this method to get the shape and proportions from a picture, then made it their own – new colors, more exaggerated wheels, extra details, and a mix of pencils, pens, felt tips and pastel chalk.
- Ages
- Ages 9–16 (grades 4–10)
- Time
- 1–2 lessons (60–120 minutes)
- You need
- Pencils (HB, 2B), ruler, soft eraser, paper, a picture to copy
What you'll learn
- How to enlarge a picture by copying it one square at a time.
- How to look at lines and shapes instead of drawing what you think something looks like.
- What a scale factor is, and how it keeps a picture in proportion.
- How to make a copied picture your own.
Classfern Pro: report writer, Ask Fern, forum and jobs – no ads. What's in Pro Join Classfern Pro
What you need
- A picture to copy (the reference): a photo, a printout or your own small sketch.
- A ruler and a sharp pencil. A hard pencil (2H or H) is good for the grid; HB or 2B for drawing.
- A soft eraser (a kneaded eraser is best) so you can erase the grid without smudging.
- Drawing paper big enough for the enlarged grid.
- Optional: tracing paper, a scrap of cardstock to cover squares, and colored pencils, markers or pastels.
Time: one lesson (about 60 minutes) for the outlines, and a second for shading and color. Don't want to rule the grids yourself? Use our printable grid sheets.
Step by step
Put a small grid over the reference
Draw a grid of equal squares over your picture, or over a copy of it. This one has 8 squares across and 6 down. Label the columns with letters along the top (A, B, C…) and the rows with numbers down the side (1, 2, 3…), so every square has a name, like C5.
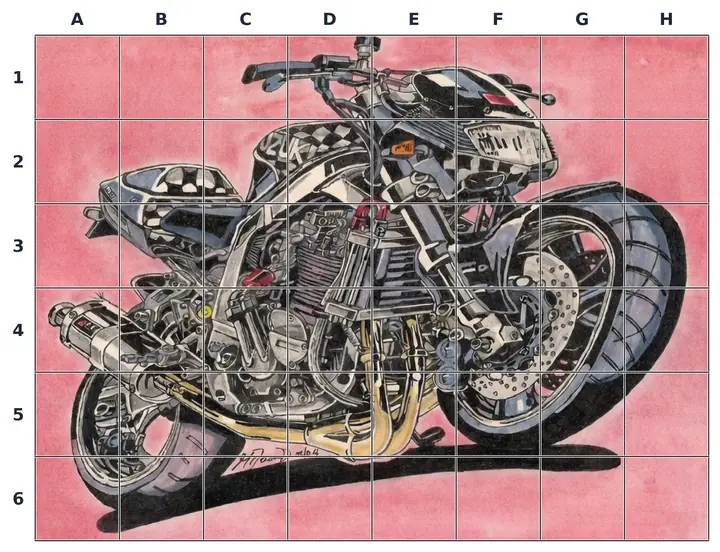
The reference picture with a small grid. Each square has a letter and a number. Draw a bigger grid on your paper
Rule a grid with the same number of squares on your drawing paper, but make each square bigger. If the reference squares are 1 inch and your squares are 2 inches, the picture will be twice as wide and twice as tall: a scale factor of 2. Press lightly, because you will erase these lines later. Label it the same way.
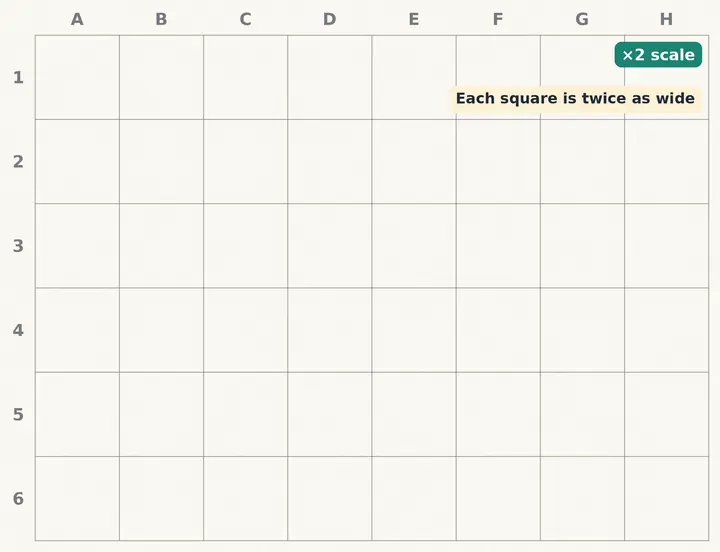
The same grid, twice the size, ruled lightly on drawing paper. Copy one square at a time
Start in a corner. Look at one square on the reference and notice where each line enters and leaves the edges of the square: halfway along? Near a corner? Draw just those lines in the matching square on your paper. Cover the other squares with a scrap of paper if they distract you.
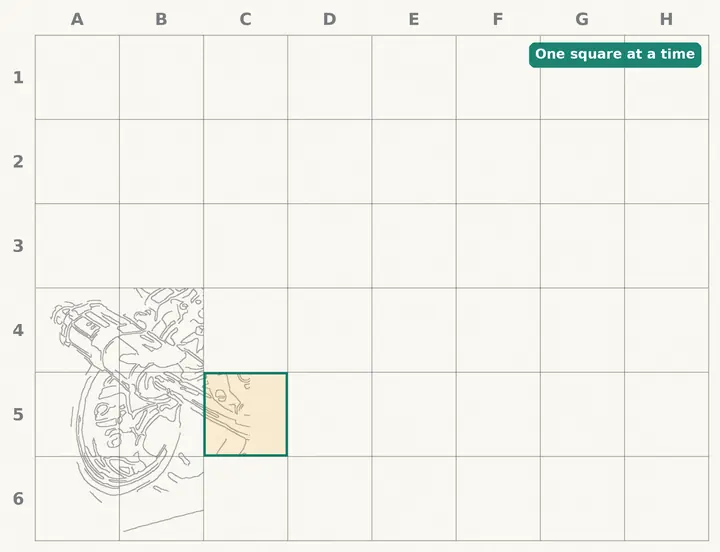
The first few squares done. The highlighted square, C5, is being drawn now. Zoom in and you can see what "copying one square" means. Square G4 on the reference is drawn again in square G4 on the paper: the same lines in the same places, just twice as big.
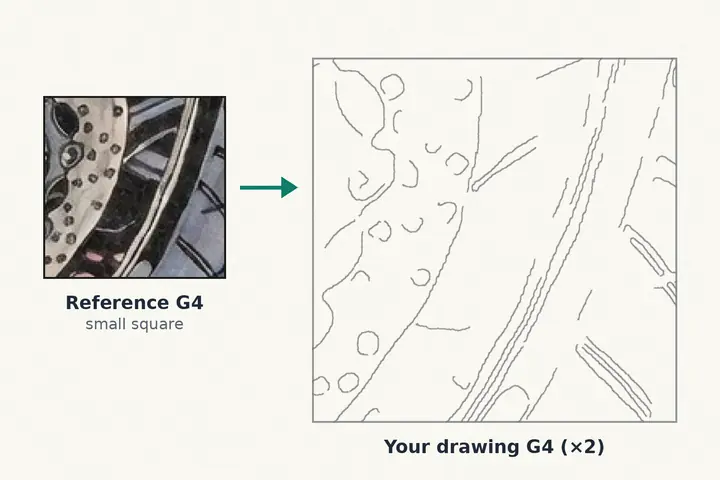
One square from the reference and the same square on the drawing, twice the size. Keep going, square by square
Work across or down in order so you don't lose your place. Lines that run from one square into the next should join up neatly. If a square looks wrong, check its name: copying from the wrong square is the most common mistake.
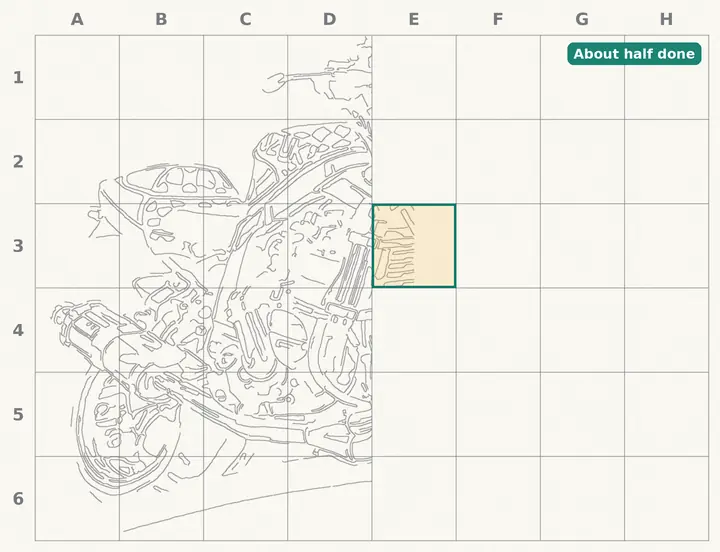
About half done. Columns A to D are finished. Finish all the outlines
When every square is done, step back and compare your drawing with the reference. Turn both upside down: it makes you see shapes and lines instead of "a wheel" or "a face", so mistakes jump out. Fix them now, before any shading.
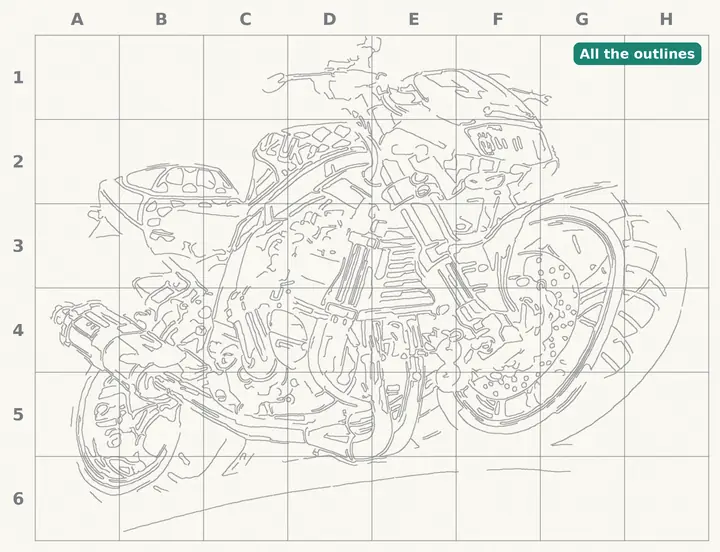
All the outlines are in place. Erase the grid
Gently erase the grid lines with a soft eraser, keeping your drawing. Go carefully where grid lines cross your outlines, and redraw any line you erase by mistake.
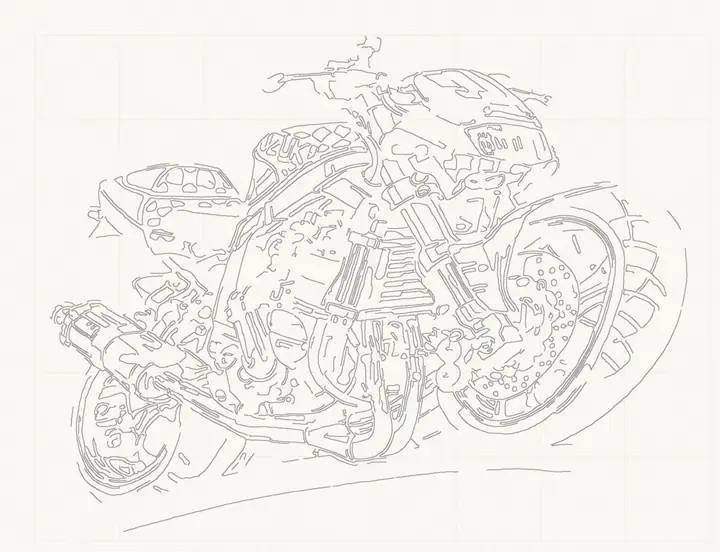
Grid gone, outlines kept. Add tone (shading)
Now add light and dark with pencil. Start light and build up slowly; a softer pencil (2B or 3B) gives darker tones. Squint at the reference to see where the darkest and lightest parts are.
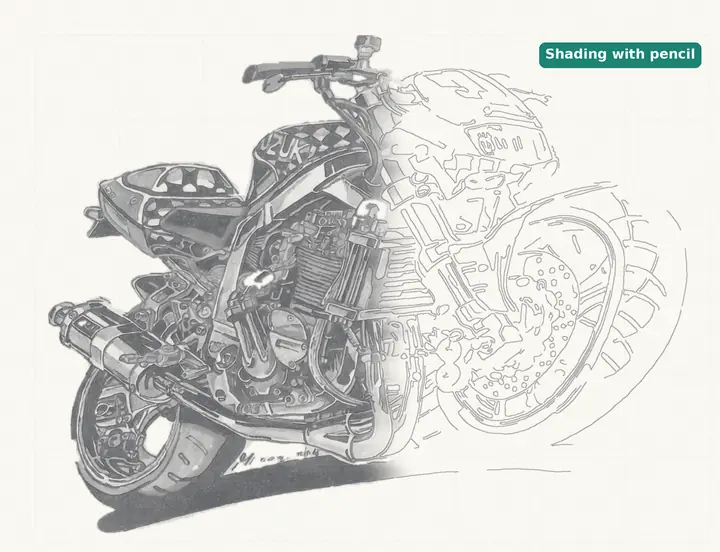
Shading added to the left-hand side so far. Ink, color and make it yours
If you want, go over the main lines in pen and add color. This is the moment to make your own choices: new colors, a bigger wheel, extra details. This drawing used technical drawing pens and felt-tip pens for the motorcycle and pastel chalk for the pink background.
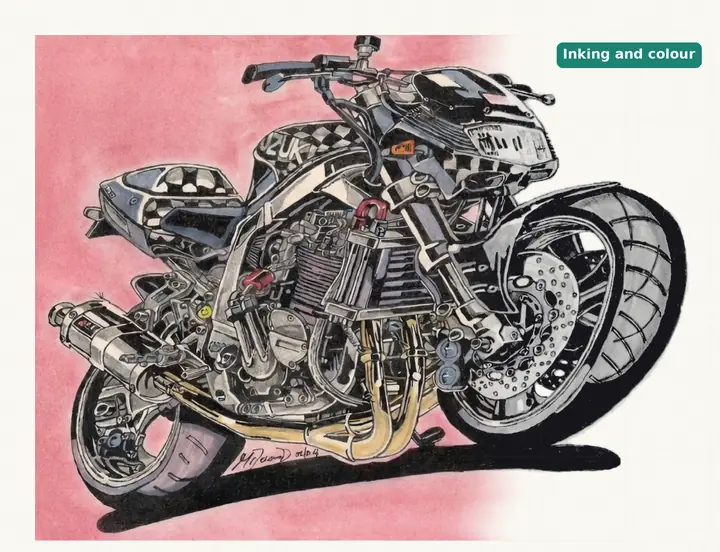
Ink everywhere; color and background going in from the left. The finished drawing
This is the real, finished drawing, scanned.
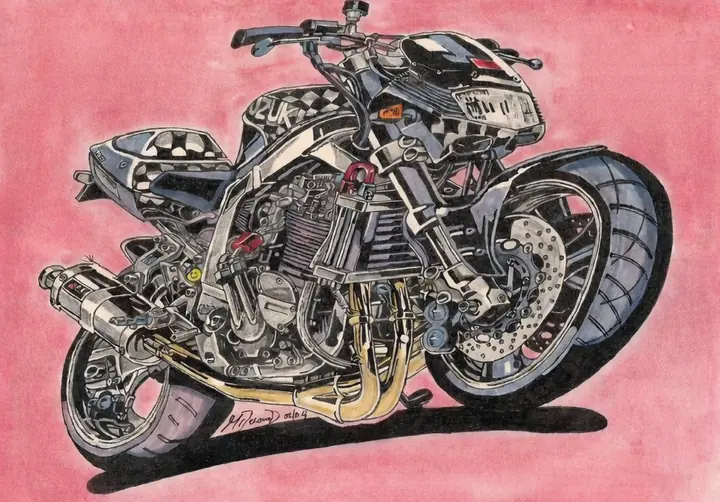
Open a larger view. Original drawing © the creator of Fern, February 2004 – hand-drawn with graphite pencils (HB, 3B, 3H), technical drawing pens, felt-tip pens and pastel chalk. Shown here as a digital scan.
About the artwork
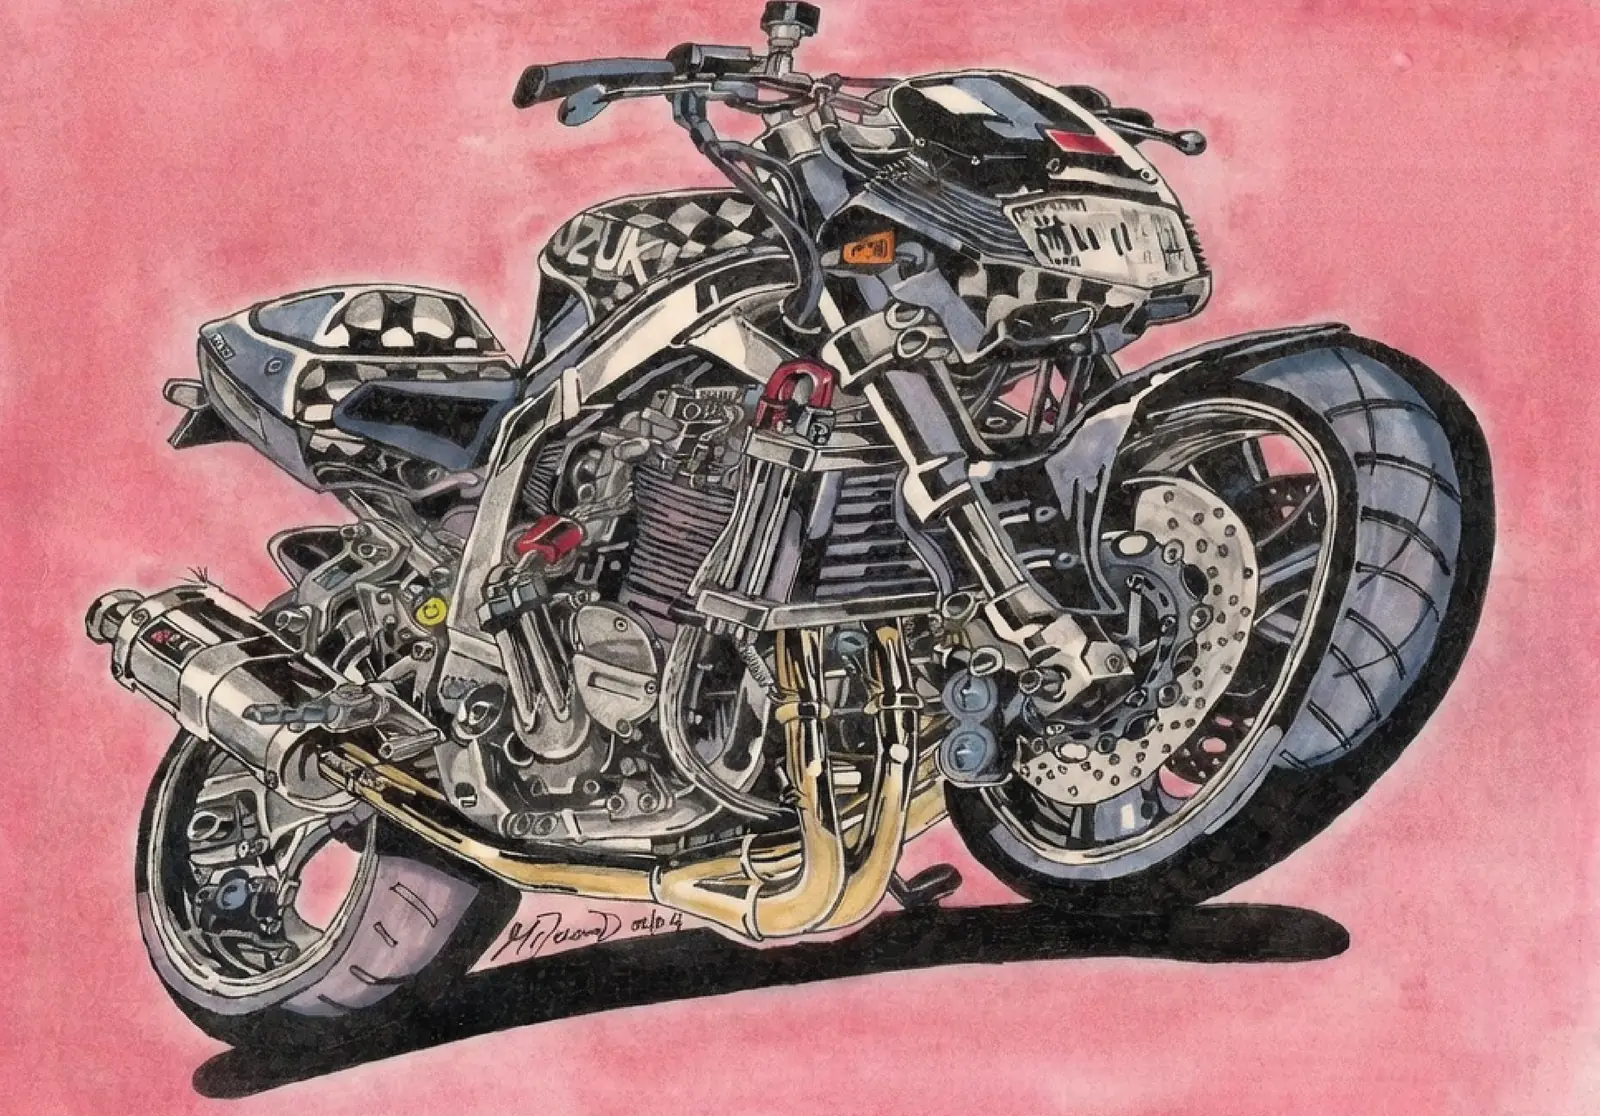
Original drawing © the creator of Fern, February 2004 – hand-drawn with graphite pencils (HB, 3B, 3H), technical drawing pens, felt-tip pens and pastel chalk. Shown here as a digital scan.
The creator of Fern used this method to get the shape and proportions from a picture, then made it their own – new colors, more exaggerated wheels, extra details, and a mix of pencils, pens, felt tips and pastel chalk.
This picture is a caricature: a cartoon of a motorcycle, drawn out of proportion on purpose. It is not a technical drawing. Look at the giant front tire, the stretched-out engine and the way the whole motorcycle leans toward you.
That shows the big idea of this lesson: the grid gets the shape right, and your own changes make the drawing yours. The grid copies shapes faithfully: if a wheel fills two squares on the reference, it fills two squares on the enlargement. What you change after that (colors, exaggerations, extra details, the materials you use) is what makes it your artwork.
Two more ways to use a grid
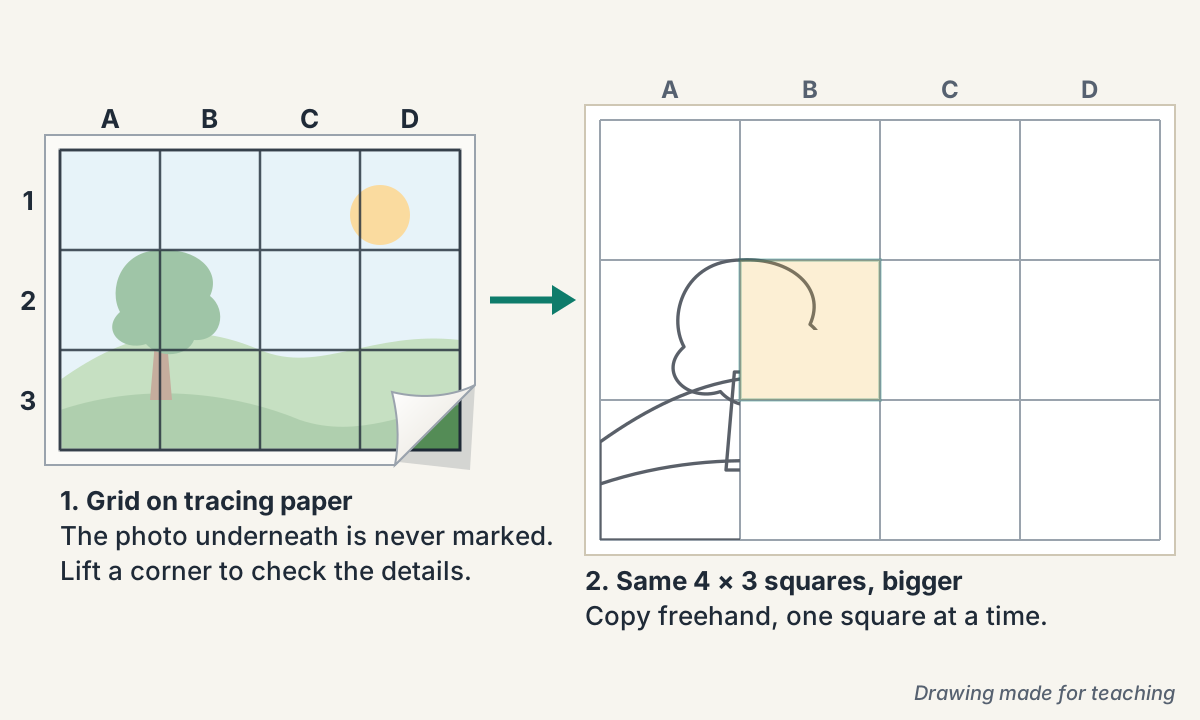
1. A tracing-paper grid (keep the picture clean)
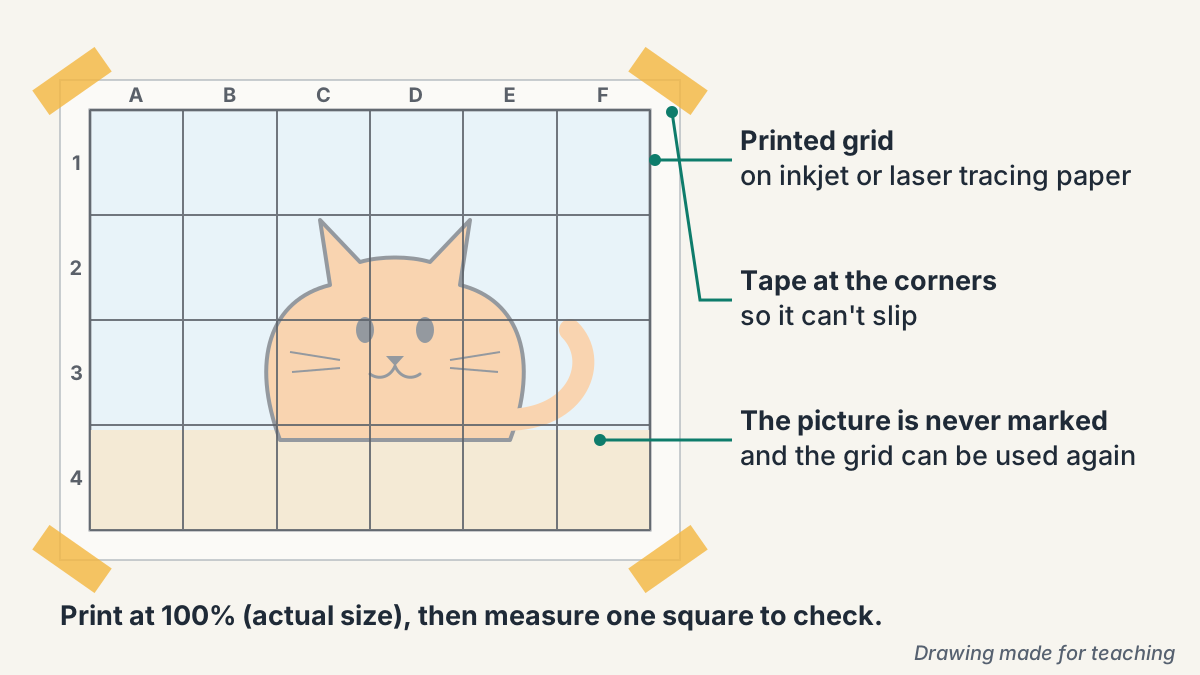
Don't want to draw on your photo or book? Draw the small grid on a sheet of tracing paper and lay it over the picture, taped at the top so it can't slip. The original is never marked, and you can lift a corner to check a detail. Draw the big grid on your drawing paper as usual, then copy each square freehand. Our printable grids include sheets for tracing paper.
2. A string-grid viewing frame (drawing from life and live portraits)
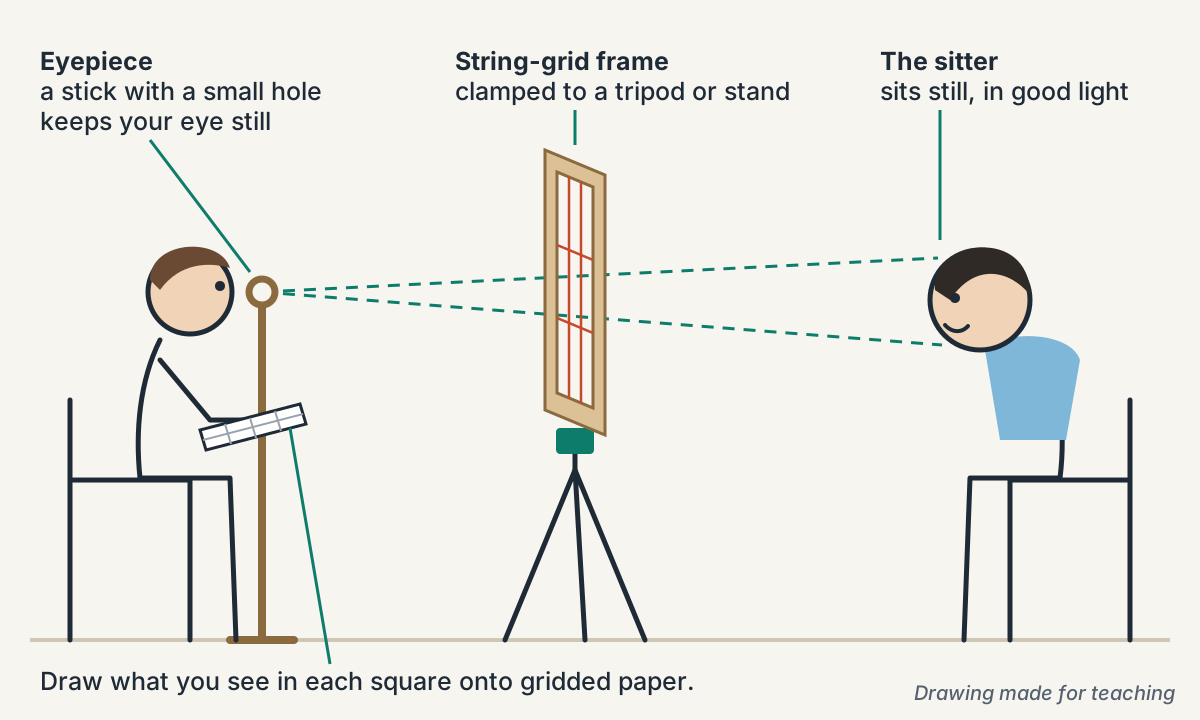
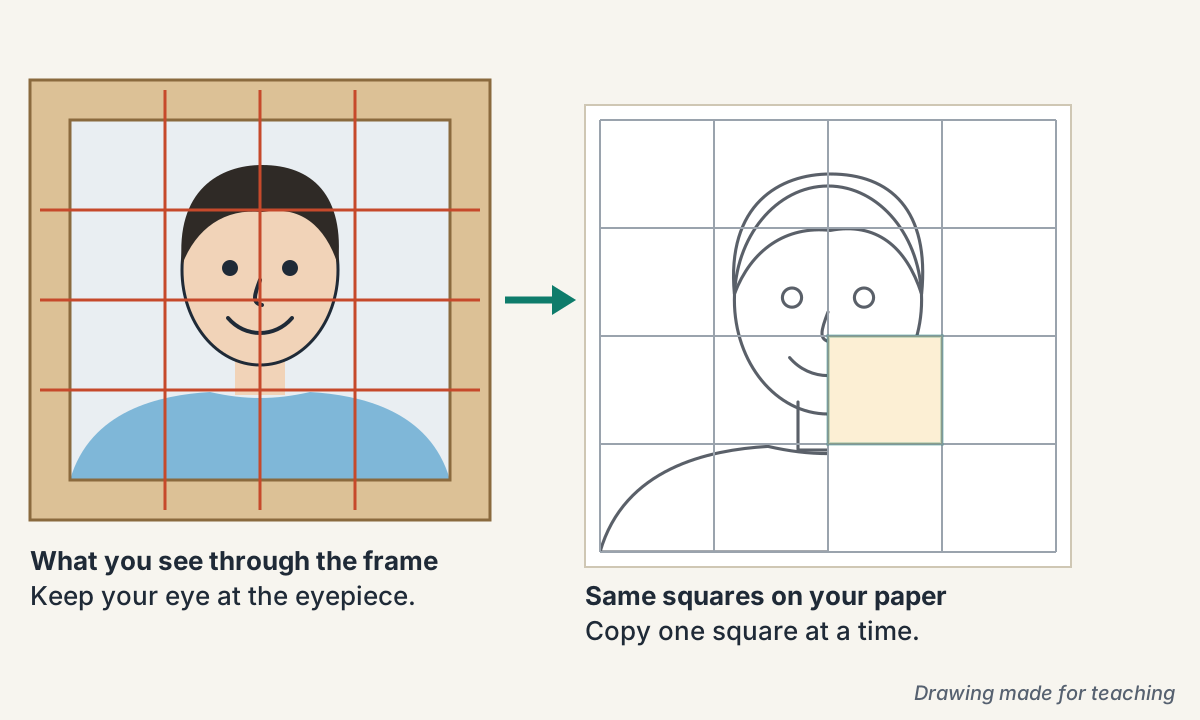
A grid also works for drawing real things and real people, not just pictures. You look through a frame with a grid of string across it, and draw what you see in each square.
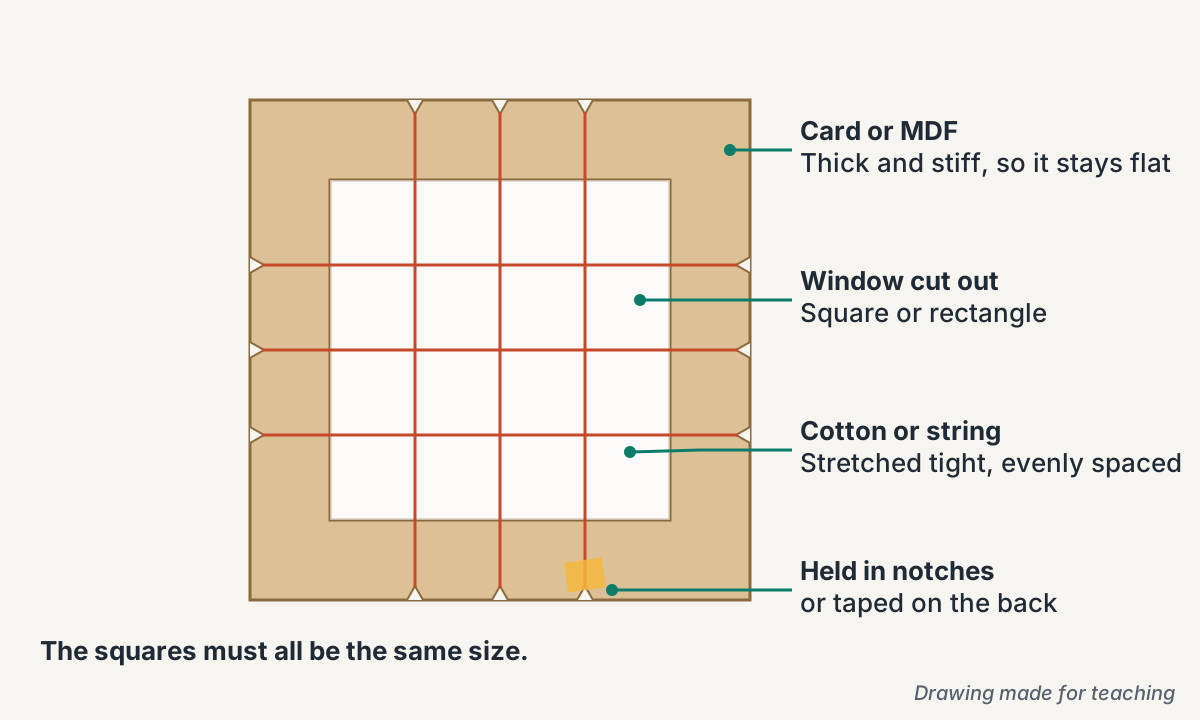
- Make the frame. Cut a square or rectangular window in a piece of thick cardboard, foam board or MDF. Stretch thread or string across the window as a grid, evenly spaced. Tape the ends on the back, or hold them in small notches cut at equal distances along the edges.
- Stand it up. Mount the frame on a tripod or a stand with a clamp, so it stays in exactly the same place.
- Keep your eye still. Make a simple fixed eyepiece: a stick with a small hole at the top, set up in front of you. Always look through the hole. If you move your head, the grid shifts against the view and your squares stop matching.
- Draw square by square onto paper with the same number of squares, just like the grid method above.
Safety: an adult should cut the cardboard or MDF, using the right tools (a craft knife and cutting mat for cardboard, a saw for MDF). Students can make their own frame from thick cardboard with scissors.
Where the idea comes from
Artists call copying with a grid squaring up. It was used in ancient Egypt at least 5,000 years ago, and Italian painters such as Tintoretto and Bronzino used grids in the 1500s to move small drawings onto big canvases and walls. In 1435 the Italian writer and architect Leon Battista Alberti described a drawing aid in his book De pictura (On Painting): a fine, see-through "veil" in a frame, crossed by threads to make a grid, set up between the artist's eye and the subject. A well-known woodcut from Albrecht Dürer's book on measurement, first published in 1525, shows the same kind of aid for drawing from life: an artist looks at a model through an upright frame divided into squares and draws onto squared paper.
Tips
- Same number of squares on both grids. Count them before you start.
- Keep the grid light. Grid lines should be only just visible, so they erase easily.
- Measure carefully. Squares of slightly different sizes stretch or squash parts of the picture.
- Look at the edges of each square. Mark where lines cross the edges first, then join them up.
- Cover the other squares. A piece of cardstock with a square hole helps you focus on one square at a time.
- Turn it upside down. Turning the reference upside down helps you draw the shapes you see, not the ones you expect.
- Use more squares for detail. Split busy squares into four, or add diagonal lines corner to corner for extra guide points.
Common mistakes
- Copying from the wrong square. Label both grids and say the name to yourself (for example "D4") as you work.
- A different number of squares on each grid, or a grid that isn't the same shape as the picture, so the copy comes out stretched.
- Pressing hard on the grid, then not being able to erase it.
- Drawing the whole object from memory instead of what is in each square.
- Shading before the outlines are checked, then having to erase the shading too.
- Erasing parts of the drawing along with the grid.
Math link: scale factor and ratio
The scale factor tells you how many times bigger the copy is. To find it, divide the new length by the old length:
scale factor = big square ÷ small square = 2 in ÷ 1 in = 2
Every length in the picture is multiplied by the same number, so the shapes stay in proportion. The ratio of the reference to the copy is 1 : 2. Watch out: a scale factor of 2 makes the picture twice as wide and twice as tall, so it covers four times the area. Try it: if your reference is 4 in × 3 in and the scale factor is 3, how big will your drawing be? (Answer: 12 in × 9 in.)
Printable grids
Free US Letter grid sheets (PDF), with squares in inches, labeled with letters across and numbers down. Need another size or paper? Make your own with the printable grid maker.
Why print the small grid on tracing paper? You lay it over your picture and tape it at the corners, so the picture itself is never marked. It's also a huge time-saver for artists: no ruling a grid by hand every time. Print a perfect grid in seconds, reuse it on any picture, and make a matching bigger grid for your paper.
Small grid: for tracing paper
Bigger grid: for drawing paper
- Print the small grid on inkjet or laser tracing paper (check the package), lay it over your picture and tape the corners.
- Print the bigger grid for your drawing paper. 1/2 inch with 1 inch, or 1 inch with 2 inch, enlarges ×2.
- Always print at 100% (actual size), not "fit to page", so the squares stay the right size.
For teachers
Standards links
National Core Arts Standards, visual arts (anchor standards; use the grade-level performance standards for your grade):
VA:Cr1.1Generate and conceptualize artistic ideas and work (choosing a reference and planning the enlargement)VA:Cr2.1Organize and develop artistic ideas and work (practicing the grid technique with a range of materials)VA:Cr3.1Refine and complete artistic work (the upside-down check, then shading, color and personal changes)VA:Cn11.1Relate artistic ideas and works with societal, cultural and historical context (the history of squaring up)
Common Core math (see the Common Core math standards):
7.G.A.1Solve problems involving scale drawings of geometric figures, including reproducing a scale drawing at a different scale6.RP.A.1Understand the concept of a ratio and use ratio language (1 : 2 for a scale factor of 2)
Your state may use its own arts or math standards; the skills are the same.
Lesson plan (two 60-minute lessons)
| Time | What happens |
|---|---|
| 0–5 min | Show the finished drawing. Ask: how could you make a small picture big without it going wrong? |
| 5–15 min | Demonstrate steps 1–3 under a document camera: labels, a light grid, copying one square by looking at the edges. |
| 15–45 min | Students grid their reference (or use the printed grids) and copy square by square. Circulate; ask "Which square are you on?" |
| 45–52 min | Upside-down check with a partner: find one square to correct. |
| 52–60 min | Wrap-up: what is the scale factor? What could you change to make the drawing your own? |
| Lesson 2 | Erase the grid, then add shading and color (steps 6–8), making at least one deliberate change of their own. Extension: build a string-grid frame and draw a partner. |
Want to adapt it? Make your own version in the lesson plan maker.
Easier and harder
- Easier: fewer, bigger squares (the 1 inch and 2 inch printable grids, or 4 × 3), a simple bold picture, and grids already printed on both sheets.
- Harder: 8 × 6 or more squares, a diagonal grid (lines corner to corner in every square) for detail, a scale factor of 3, enlarging the student's own sketch, or drawing from life with a string-grid frame.
More grid sheets
US Letter sheets (landscape) for the easier and harder versions. Print at 100% ("actual size").
- Easier drawing grid: 4 × 3 squares of 2 in
- Harder drawing grid: 8 × 6 squares of 1 in with diagonals
- Reference grid: 8 × 6 squares of 1/2 in and drawing grid: 8 × 6 squares of 1 in (the same 8 × 6 layout as the step pictures)
Sources
- Encyclopaedia Britannica: Squaring (art)
- J. Paul Getty Museum, on Google Arts & Culture: techniques for copying and transferring drawings
- Victoria and Albert Museum blog: Size does matter
- Museo Galileo, Florence: Veil (Alberti, De pictura, 1435)
- Hood Museum of Art, Dartmouth: Albrecht Dürer, Draughtsman Making a Perspective Drawing of a Reclining Woman
- State Library of New South Wales: Portrait drawing using a grid (PDF)
- The Art of Education University: Setting up a successful grid drawing
More art lessons · In the UK? UK version (cm, A4 grids).
Frequently asked questions
Is using a grid cheating?
No. Artists have used grids to copy and enlarge pictures for hundreds of years. The grid helps you place things, but you still have to look carefully and draw every line yourself, and that trains your eye for drawing without a grid later.
How many squares should my grid have?
For a first try, 4 × 3 or 6 × 4 big squares is plenty. Use more, smaller squares (8 × 6 or more) when the picture has lots of detail. Both grids must have the same number of squares.
How do I work out the size of the big squares?
Multiply the small square size by the scale factor. Squares of 3/4 inch on the reference with a scale factor of 2 become 1 1/2 inch squares on your paper.